Showing posts with label gunpla. Show all posts

MG Acguy

Thursday, May 12, 2011 Onderon 0 comments
I purchased this baby over a year ago during the first gunpla building get together I went to which was at COFA and have always been meaning to do something nice with it and since I was in the mood I decided to brush off the dust and get my arse into gear.

From MG Ball

This was the only photo I have of it before I started working on it but I'm sure everyone knows what it looks like

The goal for this project was to achieve a semi decent marbling effect and since I've never tried it b4 I found some spare parts and dabbed on some silver paint with a paintbrush and thanks to my every impressive laziness I opted to brush on a clear color instead of using the airbrush
From Gunpla

Big mistake. The brush strokes literally melted the silver paint so it became blurry but that a side I was confident with what I had to do so I busted out the airbrush and sprayed on a layer of Alclad Gloss Black - which I also forgot to take photos of.

Interesting note. The gloss black was more transparent compared to Tamiya paints so it would require multiple coats to achieve a solid look but since the Acguy was brown to begin with it didn't make much difference and Alclad Gloss Black is super cheap.

After that was to apply the patterns. At first I was planning on varying the tones by using silver and interlacing with white but since I wanted a dark shade of blue as the clear coat I figured the white would become redundant.
From Gunpla

I opted to use a soft bristle brush since it was the less messy.
From Gunpla

N.b. the paint used was Tamiya Chrome Silver and its touch dried in like 5 minutes.
ATTENTION! For all those who attempt the next part remember to lay down a coat of clear coat to protect the patterns incase you screw up the color coat like I did.

Better lighting. Sunlight is the best when it comes to photography =)
From Gunpla

From Gunpla

Notice how the patterns are pretty uniform due to using a brush. I assume using a sponge will yield more realistic patterns.

Managed to do the clear blue today after uni but made a mistake with thinning the paint on my 2nd cup hence half the parts had to be stripped down to remove all the acrylic - Glass cleaner works wonders here. It's like waxing legs minus the pain.
From Gunpla

From Gunpla

From Gunpla

Hopefully I'll remember to mix the paint properly tomorrow
Read more >>

PG strike straight build

Wednesday, April 20, 2011 Onderon 0 comments
From PG strike

Got this last Saturday and the straight build took maybe 8hrs to complete. Still got the rest of the weapons and the Aile pack to go. Half the parts have been sanded and prepped as of this post so I'm hoping to get some painting done over the Easter break. Look forward to it!
Read more >>

PG 00 Gundam part 2

Tuesday, November 2, 2010 Onderon 0 comments
Following up on what I did since my last post. Pics are self explanatory so I wont go in depth ( lawl like I ever)

First off some bits and pieces for locking mechanism.

From PG 00


I think these are the thickest springs and screws in any Bandai kit to date.

Here we have a exploded view of the locking mechanism for the elbow
From PG 00

One interesting note is that in the manual they fail to mention that part O9 is actually a tool to help with tightening the screws. I didn't know what it was and spent 30mins staring at the manual cos according to the manual there is 6x O9 but in reality you just use the single part 6 SEPARATE times.

Heres what the Elbow lock looks like assembled
From PG 00

From PG 00

From PG 00

As you can see there are many grooves along the inside and outer edges and which brings us to the next picture and another note of interest.

From PG 00

Notice the 2 tabs along the inside of this part. There are many of these at varying depths which are what locks the joints in place once you inserted the spring loaded mechanism ( which is more like an unlocking mechanism). If you're like Tim who likes to rush build his kits and ignore the directions and orientations of certain parts you will fail at this kit since a lot of parts must go in exactly as its shown and no you can't just trim a piece into the right shape Tim.

Next up is the head.
From PG 00

From PG 00

From PG 00

Like all PG's this one also has a light up feature inside the head but unlike the others the LED unit is slightly different

This should look familiar to alot of ppl
From PG 00


My stash of spare batteries once the ones supplied runs out
From PG 00


Tadah!
From PG 00


The LED slides into place via the massive hole at the back of the head
From PG 00


Did I mention big?
From PG 00


Oh yeah heres another example of what I mean earlier about correct orientation cos there's parts like this all over the place
From PG 00


Inner frame for the arm
From PG 00


+ extra layer kinda like the muscles over the bone
From PG 00


One of the disappointing things about this kit was the lack of pre-assembled hands and instead we get this runner to make ourselves
From PG 00


Bandai did help us out though and each finger segment is on the same row so all you need to do is cut out the middle part and insert like so
From PG 00

From PG 00

From PG 00


Since I forgot to take any more photos here's what the 00 looks like without its skin on
From PG 00

From PG 00

From PG 00


One last thing the eyes does not come prepainted so the black outline you see above was painted in by hand and for the illiterate on moonspeak the manual says that to leave out the stickers and markings for the head and eyes if you want to light it up since it will obstruct the brightness and theres not point in having them since the clear parts have all the text etched onto them already.
Read more >>

PG ( . Y . ) Gundam part 1

Tuesday, October 26, 2010 Onderon 0 comments
Once again I must say its been a while since I last posted *this is starting to become a bad habit XD* but I hope as usual I can make up for my lack of presence with something good - to me atleast.

A few already know that I have recently purchased the Perfect Grade 00 Gundam through unsavory means, no I did not bash a hobo for it but when the day comes that hobos carry gunpla I will.

And like usual I wont do much of an intro and just talk about what I have done thus far...in this case not much. You might also remember that Cameron wanted to go to the Central Coast last Sunday but due to bad weather and general overall lack of commitment from anyone the outing was pushed back. So what did we do? WE GROUP BUILD OUR ARSE OFF WHILE LISTENING TO MISS A nottaeme jakkuman nae gasumi!!!!

ok w/e. Anyways so we (me Tofu and Chung) headed over to our home away from home AKA Tim's place with Chung bringing along his freshly purchased MG EX-S and Tim's 90 yro PG Strike we got down to business.

I wont talk much about the kit but rather just post some lazy pictures of the progress I make.

So first off we have the inner frame of the torso
From PG 00


Looks simplistic but took a few hrs of labour and too many parts.

...aaaaaaand its about the size of the MG ball
From PG 00


By the time I was done with the torso Tim wont shut up about all the linked movement and mechanical detail on his Strike's leg and Chung mangled his EX-S I skipped to constructing the legs and as you can see its pretty fucking big.
From PG 00


Again a size comparison this time with the sexy SIC Kabuto which I never blogged about
From PG 00


That's about all I did before hungry over took us and we headed off for some lunch (which sucked)

and please close your eyes as you imagine the most incredible wrap up to this post.
Read more >>

Funnel Wars

Sunday, September 19, 2010 KOALA 2 comments
Well I'm back in action!!!
And today, presenting the MG Strike Freedom!
Its almost been a year since i bought this kit, and it was only till today that i gathered up the energy to build it.
Perhaps it was because I previously overloaded on building 5 00 Gundams just to equipt a single unit with as much shit as possible.

From Gunpla

Im sure most of you readers would have seen the MG Strike Freedom before, so i bother posting too many pictures (unless requested).
But here is the final product.
With the Dragoons on display, it makes the whole unit quite big.
From Gunpla
The total foot print would probably go beyond the size of the MG Ex-S, which is one of the biggest MG gundams out there.
Then again, the same could be said for other MS with remote bits
From Gunpla
The MG Hi-Nu, also occupies quite alot of space when the fin funnels are displayed.
Read more >>

TO INFINITY AND BEYOND!!!!

Tuesday, May 4, 2010 KOALA 0 comments
As most of you who have been paying attention to the Gunpla side of our blog, i recently bought a MG Destiny Extreme Blast edition, and have started construction on the wings.
However, yesterday, a newer and better MG arrived, so that put the Destiny Plan on hold, and gave way to the Infinite Justice.
Unfortunately, i left my ZR1 at Tofu's place, so you'd have to put up with pics from my old casio

From Gunpla

From Gunpla
Spot something wrong with the picture above??
Yeah, the beam sabre slipped out of the left hand when i was taking the picture, so its holding onto the beam.

HANG GLIDER MODE!!!
From Gunpla

From Gunpla
ONE HANDED!

Anyways, the Infy is an excellent kit. I'll do a more detailed review when i get my camera back
Read more >>

Dendrobium part 1

Friday, February 5, 2010 Onderon 1 comments
Hey guys! Been a while since my last post as I was overseas and blogspot was blocked lawl (china rofl) So as a way to make up for my extended absence I'll start off with something big. Thanks too everyone who pitched in and got me this wonderful gunpla for my 21st and after many months of contemplation I've started putting it together and it's quite overwhelming.

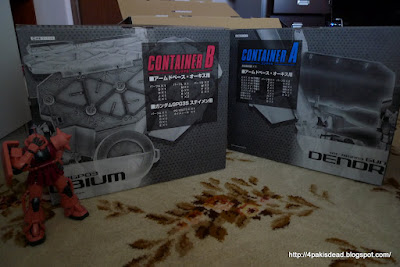
For those you didn't get a good look at it during the present opening or for those who want a size comparison, I am assisted by Char's ZakuII 2.0 and the dendrobium box dwarfs the red comet!
From Dendrobium

From Dendrobium


A quick look of the contents reveals the construction manual and my first time encountering one which is made from really thick and super glossy paper
From Dendrobium


Shiny!
From Dendrobium


Zaku II sneaking a peak into the box and dun dun dun the runners are divided into 2 compartments
From Dendrobium


If you put the 2 boxes next to each other with A on the left they for a profile image of the kit
From Dendrobium


Kudos for Bandai here. Runners are arranged in such a way that when building you start from box A and lift out the runners as you go through the steps without having to randomly dig through a gigantic mess
From Dendrobium


Just showing off the shear size of some of the pieces and these arent even near the largest!
From Dendrobium


Contents of box A
From Dendrobium

and B
From Dendrobium

Most bags contain 2 runners with some being multiple copies while some are just placed together for convenience

Oh and here's the runners for the GPO3 codenamed "Stamen" while the bigass mobile armor is codenamed "Orchis" and combined we get...the Dendrobium.
\
From Dendrobium

A little trivia for those interested the Gundam's from the 0083 series are named after flowers like the GPO2 FB "Zephyranthes" and the GPO2A "Physalis" N.b. not syphilis.

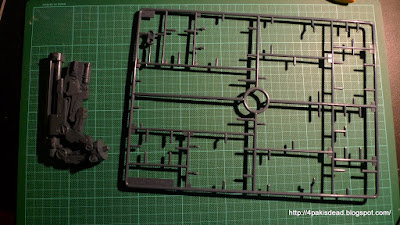
Here are the runners for the GPO3 all laid out and yeah its a tiny kit but remember it is in 1/144 scale
From Dendrobium


I wont be doing a proper WIP but I'll try to document the more interesting parts as I go along so bare with me and try to stick till the end!

Found in box A are 5 types of screws and 2 springs
From Dendrobium


Bandai shuns from using screws with their newest products but with the dendrobium it's clearly a must with really heavy moving parts heavy duty joints are required
From Dendrobium


First off is the S runner x2 and as you can see 1 entire runner + some screws and polycaps are needed just to build the internals of appendage which later on we'll see that it connects to the primary weapon and defense equipment of this mobile armor
From Dendrobium


Some more comparison photos and as you may notice I'm working on a cutting mat which has 1cm squares on it for easy size estimations
From Dendrobium


More randoms
From Dendrobium

From Dendrobium

Guest featuring my left hand!

Incase of emergency you may throw this block of plastic for massive damage!
From Dendrobium


2 "appendages" one for each side and is it jsut me or do they look like a pair of handguns? DUAL WIELDING !!!
From Dendrobium

From Dendrobium

PEW PEW
From Dendrobium


Moving on these 2 enormous parts make up the core of the armor
From Dendrobium

and for something so big the molding is very good with lots of detailing

I forgot to mention earlier but the kit also comes with 3 pieces of metal plating which are used to secure multiple sections of the core together as well as adding strength and relieving stress off the plastic.
From Dendrobium

the stuff is thick!
From Dendrobium


And fits like so
From Dendrobium


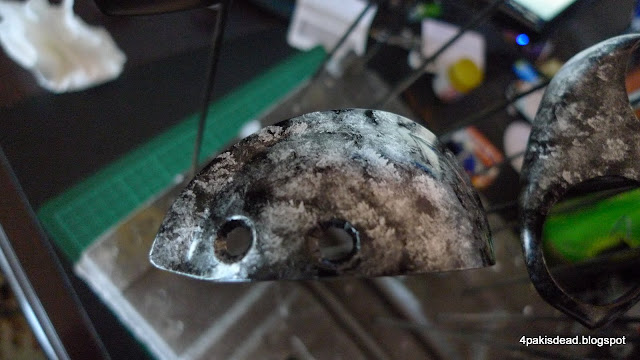
Here we have a part of the hull
From Dendrobium

Kinda reminds me of a space shuttle
From Dendrobium

...oh what? Your telling me its a space ship?

No gunpla kit is complete without a hip joint and presenting the heavy duty version
From Dendrobium

From Dendrobium


construction is slow with trimming and carving parts so atm it just looks like some space debris
From Dendrobium


The other 2 pieces of metal as used for the bow of the armor
From Dendrobium

Because its gotta support this as well
From Dendrobium

8 Screws of 2 different sizes are used to secure this half to the core
From Dendrobium


And here's a shitty picture of it supporting itself on its handgun wannabe appendages
From Dendrobium


It would be illogical of Bandai not to include a stand for this as it does not have legs wheels or a come ontop of a cushion lawl
Base
From Dendrobium

and the support
From Dendrobium


TAH DAH ready for some massive head trauma?
From Dendrobium


I was worried for my poor desk as it looked like it was gonna cave under the all that weight but fear not all is well
From Dendrobium


Thats all for now oh and did I mention this will be picture intensive?
Read more >>
Related Posts Plugin for WordPress, Blogger...